Wednesday, December 31, 2014

Happy New Year!

Happy New Year!

With the holidays coming to an end, I'm honestly glad to say that not only am I sad to see them go (for my kids sake), but I'm glad that the hustle and bustle is coming to a close. I've honestly missed having the opportunities to create and craft!
Today I had some spare quiet time and felt the need to get back on the creating and posting wagon!

When I purchased this stamp from The Greeting Farm, I purchased it intentionally for a new year's greeting! I have a lot of wine friends and thought this would be perfect!


I'm not going to lie...it was a little rough getting back into the swing of copic coloring since I literally haven't done it in almost a month! But, I pulled thru it! This image helped a lot because she was easier to color than a lot of other TGF images :)

To see the full process, all the copic colors and products used, be sure to watch my YouTube process video below!


Thanks so much for stopping by!
I hope that you and your family have a happy, healthy and blessed new year to come in 2015!


Tuesday, December 16, 2014

Documenting December: 2 Layouts for Day 14

Hi all!

It feels like its been forever and a day since I made a post!
Holiday's are really upon us and I can't seem to find the time lately to catch up on all the scrapping I want to do!  Today I had the day off from work and decided that I was going to dedicate this day to catching up on projects that I've wanted to complete for a while! The first projects were my Documenting December pages. I only had day's one and two done and after today, I'm all caught up! I will post pictures of all the pages soon, but I did want to show two layouts that I did using a sketch from Paper Issues! I was browsing around their blog and facebook pages last night and was really inspired by their Sketchy Saturday post from last weekend!  Here's the sketch...


Based on this sketch, I pulled out some October Afternoon papers that I've been hoarding for a while and used them!  I created the following two layouts to go with my Day 14 pocket page...


It's been a very long time since I'be done actual layouts and there are definately things that I will change for next time, but over all, I'm pretty happy on how they turned out!

Until next time, have a scrappy week!


Sunday, December 7, 2014

Photographing Children This Holiday Season & Really, Any Time of Year!


Hello everyone!

When Sarah, owner of The Studio 29 Designs, asked me to write this blog post, I was just absolutely thrilled! A lot of people have been asking lots of questions on how to photograph different aspects of life and looking for photography advice. So, Sarah asked if I would share with everyone my tips, tricks and ideas for photographing children at home this holiday season and really, any time of year!  I'm NO pro by all means, but I do have a couple of pointers and tricks up my sleeve that have seemed to work for photographing my 7 and 4 year olds over the past few years! I promise that I'll keep this short and sweet and hopefully it won't be information overload! :)  I have a few very basic tips, then at the very end, a couple more advanced.  I also did snap pictures of my kids while decorating our tree to give visuals along the way so hopefully it helps explain things a little better! But remember, these tips can be used for any occasion or season. It doesn't have to be Christmas!

First off, the biggest thing with kids, obviously, is that they hate the day when it come to put on those itchy christmas sweaters and pose in front of a dozen giant bright umbrellas. I personally don't like it much myself! The idea of the perfect pictures has been set in the minds of all of us that it has to be the perfect pose, with the perfect backdrop, with the perfect lighting AND the perfect smile. WRONG!  When your kids have as much character as mine do, get them out of the studio and let them be themselves! I find that I capture  the best memories and moments when I just let them be who they are. My little peanut, Jordan, loves putting the candy canes on our tree. So, when it came time for them, I was ready, camera in hand, to start firing away! He decided he wanted to give this one a quick "hug" before he put it on the tree.  If he was my only child, this would be the christmas card picture! lol....but since he's not, we'll just blow this one up for at home! :)  


If you are looking to capture a moment similar to this, be sure to always have your camera ready, in hand, with the power on and your finger on that silly auto focus button that we have to hold half way down! Some of the cutest moments happen very fast!  And remember...children are not very tall!  Get down on their level...we don't want all of our pictures to be of the tops of their heads or with them looking up at us. ;) 

My favorite part about photographing my kids is capturing the moments when they are doing the things that they love to do. "Movement" is not always the enemy in photography. This is probably one of my fav's of my oldest son, Alex, setting up our Nativity. This is his favorite part of the whole decorating process....the part he looks forward to doing. So, I know that this was a photo opportunity...one that I had to have for my december daily. When I use photos with movement, I always add a caption or journaling to it so that it explains exactly just what it is that they are doing or what just happened.  For example, this one will definately go into detail on how he just put baby Jesus into the manger.  And if you'll notice, I'm at his level! Literally laying on the floor! Standing or kneeling sometimes isn't the best solution :)

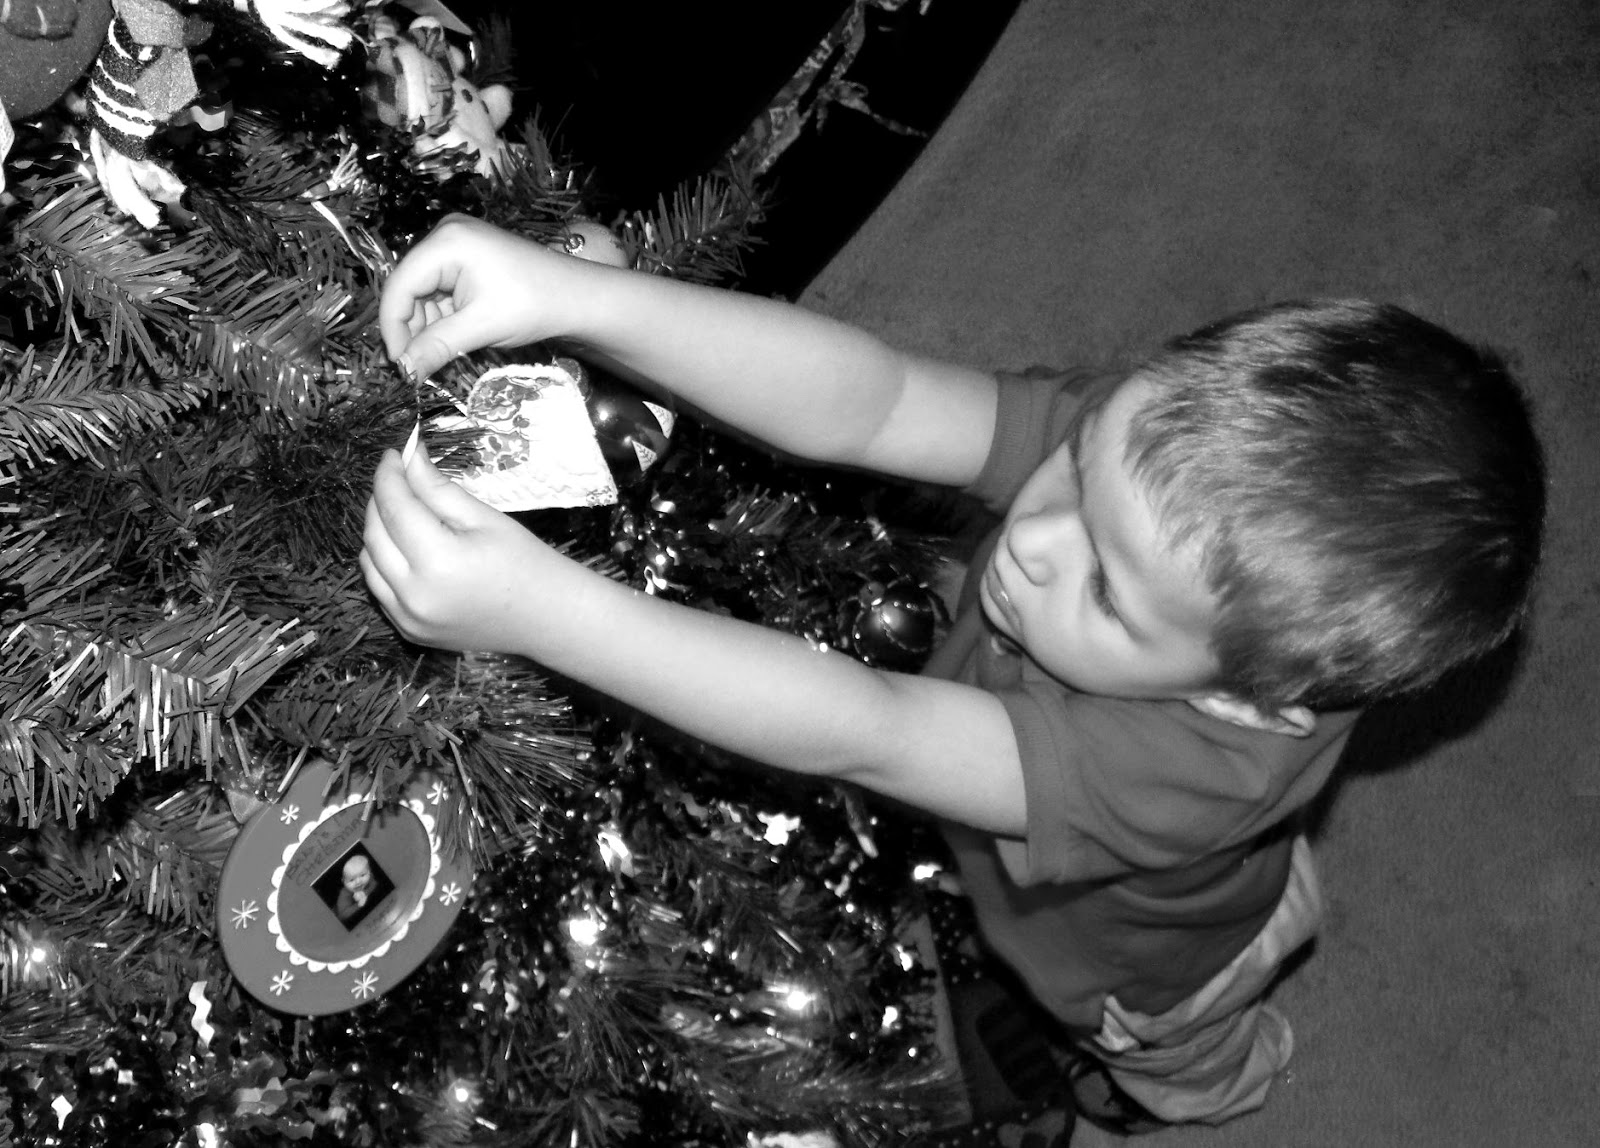
Another simple memory moment is when they hang that special ornament on the tree...the one that they know has their name on it and that their brother isn't allowed to touch.  Find funny moments and don't be afraid to capture those as well!  If I hadn't mentioned this, you would have never known that the photo below was of anything humorous because of the fight that happened right before this moment! But with the perfect caption and journaling, this boring photo will definately bring smiles to everyone for a long time.


Don't have siblings? Don't need them to capture the funny times! I'm sure that every tree trimming, holiday or birthday will have that time where someone gets tangled in lights or tinsel...or the silly pose when mom or dad is putting the skirt on the tree...or when the dog snags that corner piece of birthday cake with the balloon on it that all the kids wanted!  There's always fun times in every occasion. That's why the number one tip I can give anyone is to make sure "the photographer is always ready!" Because if you're not ready, you'll never have that moment to share <3

Another tip is that it is perfectly 'ok' to shut your flash off. Here is a prime example! No flash on the top and with a flash on the bottom...


The top may be a hare blurry in some places, but in my opinion, it captures the moment better because of the appearance of all the christmas lights around him. It also gives the picture a "warmer" feeling as opposed to the blue, "cool" feeling the flash gives the lower picture.

The final tip I have is to change up the color every once and a while! Change the mode on your camera to black and white or sepia tone! It adds a really cool touch sometimes!


In a nutshell, the basic tips that I have are these...
1. Always be ready to capture the funny moments-keep that camera in your hand if you're adamant to capture the right moment
2. Let them be themselves-forget the poses and let them have fun!
3. Take them outside! Sometimes this gives them the opportunity to feel more comfortable and it gives you the best lighting!
4. Are they camera shy? Tell them to close their eyes, squeeze them really tight and think of something funny. While their eyes are closed, get the camera in position! Then on the count of 3, have them open their eyes and give you the biggest laugh, smile or funny face they can give...chances are, they are already laughing, which gives you the smile you're looking for, AND then they know cameras can be fun!
5. Don't be afraid of pictures in motion.  Those always have the best stories.
6. GET DOWN TO THEIR LEVEL!!!  Even if it means you're laying on your stomach in the grass! lol!!
7. Photographing babies or infants? Put them in something giant! Like...a big box, a big chair, a big shirt or even big shoes! Captures the cuteness of them being so tiny <3 That also makes for a great photo opportunity when they are older to photograph them again in the same item :)
8. Don't just take one or two pictures of the same moment! Jordan's candy cane picture above...I took it 12 times until I got the perfect one! Chances are, out of 100 pictures that I took of  them trimming the tree, I'm only going to print 20 because one thing or another. There's always the time where their eyes are crossed or our finger is over the flash...things just happen! lol!! We are digital now-a-days and it doesn't cost anything more! Just delete it later!
9. Shut your flash off once and a while...and if you're not sure if you should or not, take the picture twice...once with a flash and again without.
10. Change up the color! Turn your colored photo into black and white or sepia tone!
11. And finally....don't put the camera down when they start crying or get tired. Sometimes the cutest facial expressions come from these moments or the moments that follow when they realize that picture taking is finally over and you can maybe catch that moment of celebration with a half pouty face :)


Tuesday, November 11, 2014

Creating My Own Project Life Cards

Good Morning!

I've been up working on all sorts of things this morning already!
I recently received the Days of December Kit from The Studio 29 Designs and it is jam packed full of the new Fancy Pants Oh Deer papers, ephemera and tons more!  I am just in love with all these cute little images and all the bright colors! So bright and cheerful!

I thought I'd dive right in to making cards for my upcoming December Daily album...it's going to be here before we know it and why not "try" to be prepared! lol!

I have used the Lawn Fawn stitched dies, and the "happy" and "hugs" Technique Tuesday word on a line dies to create these three 3"x4" cards....


How adorable are these papers and elements?!  I have so many more projects laid out on my desk right now to create using more of these cute items!  Stay tuned!


Take 10 November 2014 Kit Reveal!


Good morning!
Today I have the pleasure of sharing the November 2014 Take 10 Kit!  I'm also super excited to share that I have also contributed to the November release! I have created the digi release for this month along with a digi release for the Days of December kit! Be sure to head on over to The Studio 29 Designs to check out all the new goodies!

One big step for the Take 10 Kits this month is the fantastic new packaging! No more guessing on what colors are included in the kits! Sara has created the insert cards with the color scheme right on the outside for us to use!


I have created a quick layout using this months kit....


For a full process of this project and a walk thru of the new kit, please watch my video below...


Thanks so much for stopping by today!
Be sure to head on over to The Studio 29 Designs for all the add ons that were released, including my 2 new digital sets HERE!


Sunday, November 9, 2014

Take 10 Sneak Peak: Thankful For You Card


Good Sunday Morning All!
Today I'm honored to share with you my sneak peak of the November 2014 Take 10 Kit! This months kit is absolutely beautiful and I can not wait to share the full reveal! The cards are outstanding and so colorful and all the elements included this month are just perfect! By far my most favorite kit so far!

Today, I'm sharing a process video for my sneak peak creating this card below....I want to show all of you that this kit is so versatile you can create just about anything!


When I was preparing for this project I wanted to keep it simple! Some pocket scrapbookers are not card makers, yet it's still possible to transform any 4x6 card into a beautiful greeting card! This project is easy enough for any beginner to tackle!  Even if you don't have a circle die and die cut machine, you can still grab something from your kitchen, like a bowl, and trace around the card and just cut with scissors! Easy peasy!  Add a little white detail, some white ribbon or seam binding and a few hearts and voila! You're own version of what I have showed you today!

To take a look at my process video and see the supplies that I have used in todays project, please click on the video link below!


I hope that I have encouraged all of you to take a different look at the huge stash of 4x6 cards in your collection!  I would love to see your version of today's project!

Be sure to follow Take 10 on facebook to get all the sneak peaks each month! Visit The Studio 29 Designs HERE to sign up for the kit and shop for add ons! Don't forget, kits are only $10!

Until next time, have a blessed Sunday!


Thursday, November 6, 2014

Holiday Card Series: Distress Inking A Background

Happy Happy Thursday!  
One more day....just one more day....lol!!!!

Today I have a couple projects that I'm going to share...the first being the next card in my Holiday Card Series!
I wanted to use distress ink for the background and just create a single stamped image embossed on the front.  I always tend to use lots of layers and embellishments and when it comes time to mail them, it always costs and arm and a leg! So! My goal is to create a lot more "flat" cards to drop in the mail!

Today I used several Tim Holtz Distress inks along with an older Hero Arts wood mounted stamp to create this project:


I decided in the end to heat emboss with glitter embossing powder over the pigment ink i used for the tree and then to also use gold embossing powder for the star.

To add my sentiment, I grabbed a scrap of vellum and heat embossed the sentiment on there, then tapped it to the card.

In the end, I thought the background needed something a little extra so I grabbed my white gel pen are drew in little white dots for snow.

If you would like to see the full process of this project along with what supplies I used, please watch my YT video below:


Thanks so much for stopping by!
See you all the next time!


Thursday, October 30, 2014

Fall Layout Featuring Take 10 Digital Kits!


Happy Thursday!

Whoot! Whoot!  Finally got some fall pictures in and just had to play with them this morning!  Today, I wanted to feature the Take 10 Digital Cards and also the Digital Labels for October 2014!  The main kits have already started arriving in homes and I wanted to share how these digital kits would work wonderful not only with the current kit, but also by themselves!

If you haven't subscribed to Take 10 kits, but would still like to play with the amazing digital downloads from October, please be sure to visit their website HERE for these amazing cards/labels that are quite inexpensive!

Here are 2 layouts that I created today strictly with the digital downloads! There are 2 elements that came from their regular kit and that was the wood veneer banner and the "fun" paper clip. 


There were only a very few other items I used from my stash and this is what they were...


Thanks so very much for stopping by!
Be sure to head on over to The Studio 29 Designs to see all of their amazing products!