Friday, January 19, 2018

The Sweet Life | Shimmerz Paints

Hello crafty friends!
Nicole here and today I have a mixed media layout featuring a couple different Shimmerz products!
I found a really cute picture of myself when I was cleaning recently and decided that was exactly the photo I wanted to use! I don't get to use pink very often (having two boys makes it too hard), so with Valentine's Day upon us and everything pink taking over my desk, it was time!
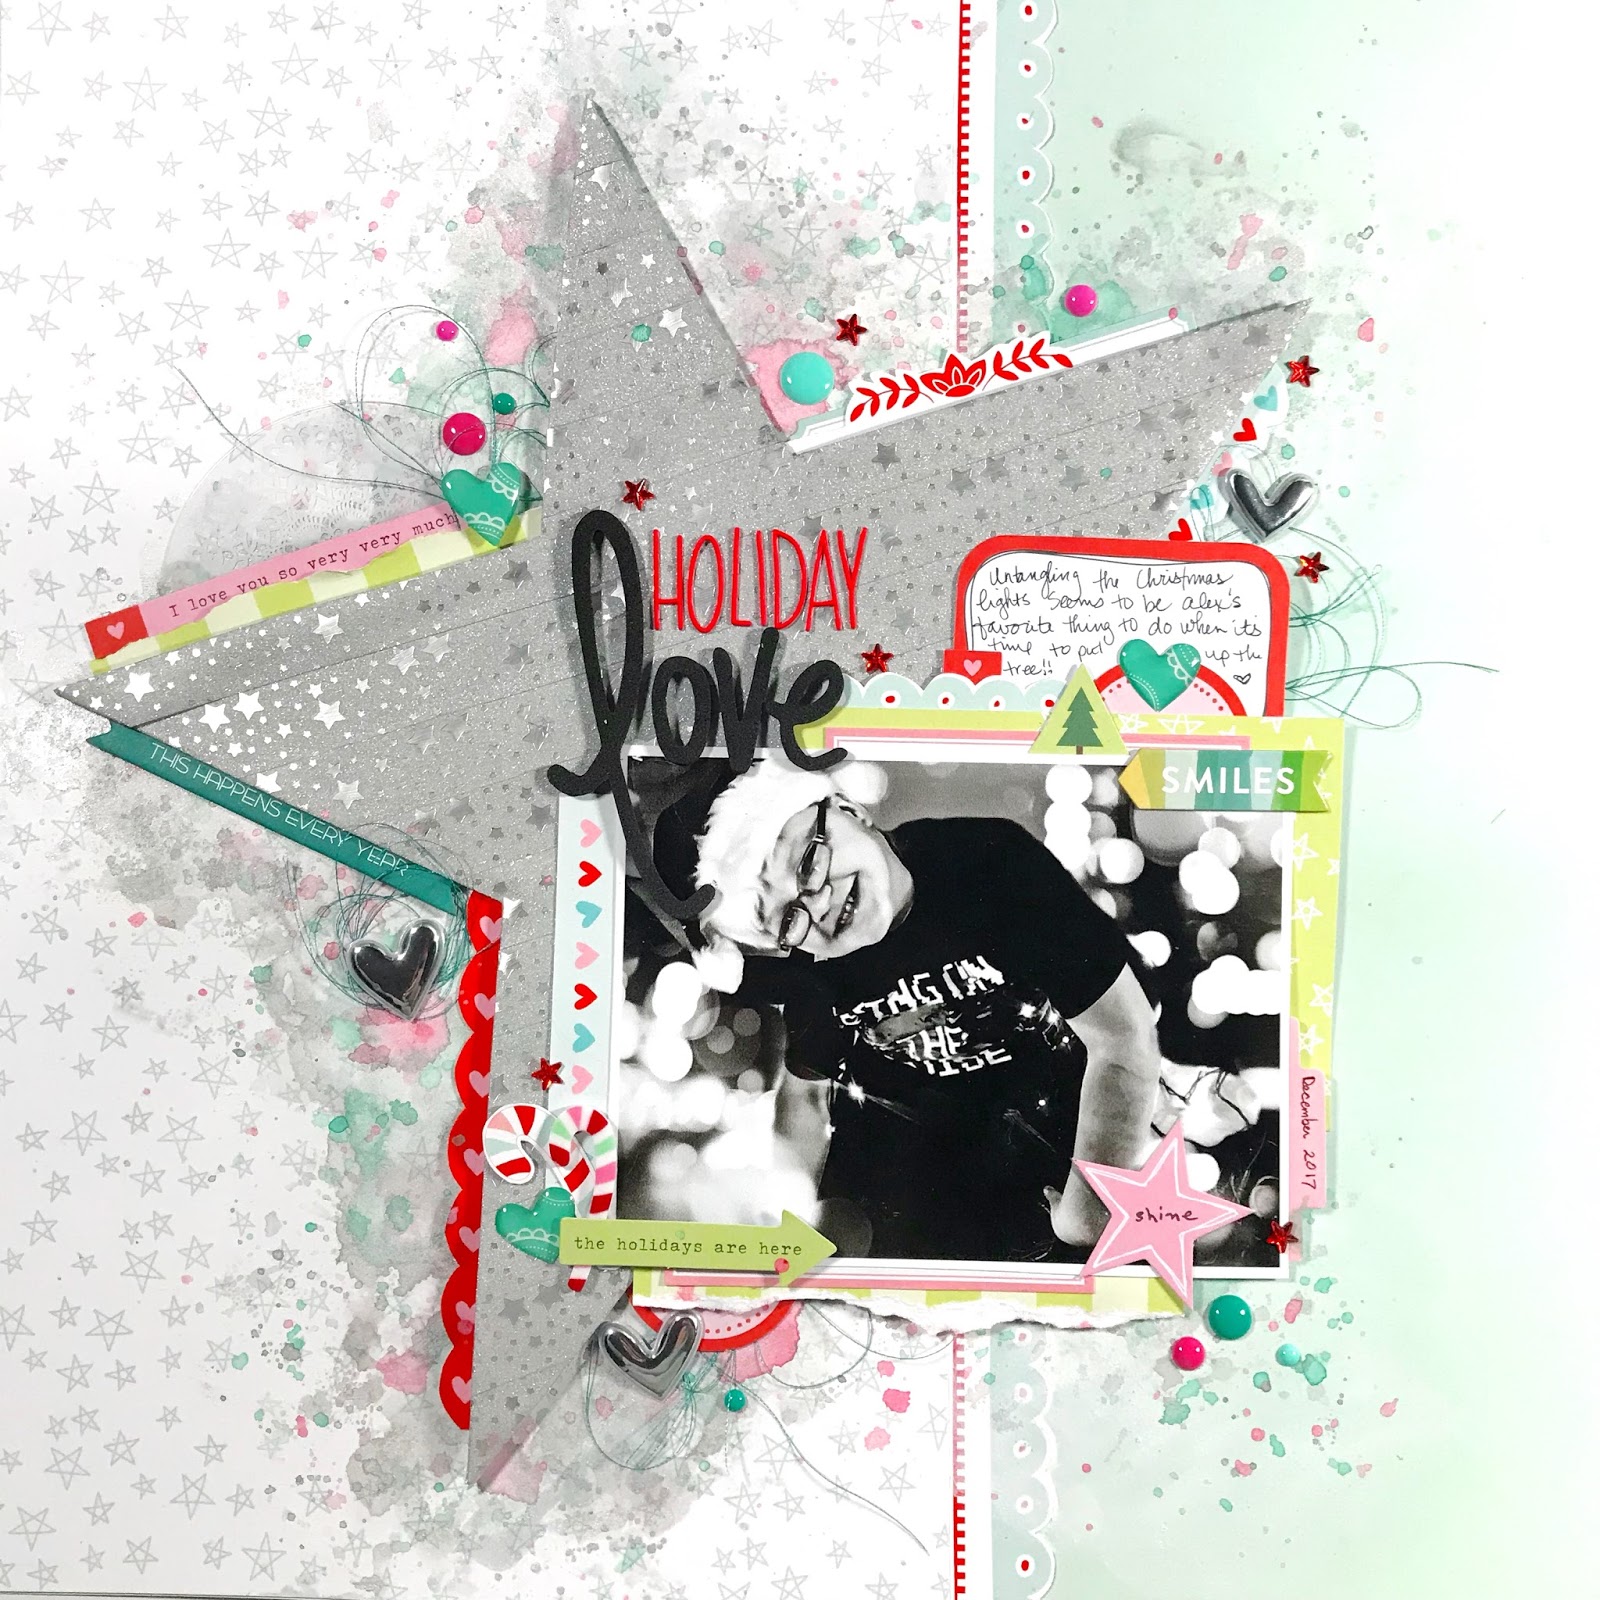
Before we begin, here is a quick look at my final layout:


I began my layout by applying a layer of Spun Sugar Dazzlerz over an XOX stencil that I created on my Silhouette Cameo. Once I had a layer of the Dazzlerz down, before I lifted the stencil, I also applied a layer of Paste-Eez in Puttin' On The Glitz over top. This adds a glitter layer over top the Spun Sugar and it is BEAUTIFUL!


 Once that layer was dry, I used my Coloringz Well Blue Me Down, Spritz Cotton Candy and Inklingz Lover's Lips and applied splatters of color all over my background.


Once all my color was dry, I began to add my layers to my photo and decided to offset it to the right of the page. This gave me room to add my title and embellishments to the left of it and still be able to show off the shimmer from the background layers. I also used a really small heart stamp on my layout this time. I haven't stamped on a layout in a long time and I'm not sure why! I will be definitely doing this again soon!
I really dug deep into my stash of papers and embellishments for this layout and used a lot of scraps and pieces that I've been hoarding for a while. It really felt good to use up product! I think I'm going to set a goal for myself to use up my scraps before I buy any more...we'll see how long that lasts! lol! Here are a few other close ups of my layout:


 BONUS!!!
I have uploaded my XOX Silhouette cut file to my Google Drive!
You can download the cut file I used to create my stencil for free HERE!

Remember that when you make a purchase over at the Shimmerz Shop, be sure to mention "Nicole" in the comments section during check out to get a free mini product with your order!

Thanks so much for joining me today!


Friday, January 12, 2018

Coffee and Chocolate TN Layout | Freckled Fawn

Hello Lovelies!
Nicole here and today I'm sharing a travelers notebook layout using the December Freckled Fawn Embellishment and Paper Kit! Here's a quick look at my final TN layout:

When I first received my December Kit, I instantly wanted to hoard this piece of paper with all of the coffee/tea mugs on it! I really did set it aside secretly hoping I wouldn't want to cut into it, but that did happen! I was browsing the Silhouette store one day and stumbled upon this cup cut file and that was it! The paper was going to be used! lol! 

For the left side of my page, I used a piece of this paper, a 3x4 card, larger journaling piece and small bits from the cardstock die cuts, epoxy heart stickers, vellum 'pie' sticker and enamel stars from many many kits ago! I wanted this side simple so the focus was on the background paper and journaling. (I did add in my journaling after my layout was complete :))


The right side of my layout featured the two coffee/tea cups, stacked together, with my two small photos tucked inside the tops of them.  I added more of the die cuts, epoxy hearts and star enamel stickers. To ground the cups, I used the patterned washi strips, "december" and tea cup from the vellum sticker sheet.  I also added the "yum. yum. yum." sticker to the top of my page from this same sheet.


To finish my layout, I added in splatters of gold and pink shimmer mist over both pages.


Thanks so much for joining me today!
Until next time, have a fabulous week!

Tuesday, January 9, 2018

Holiday Love Layout | Freckled Fawn Kit

Hello Lovelies!
Nicole here and today I have a fun and sparkly layout for you!
Today, I'm creating with the Freckled Fawn December Embellishment and Paper Kit.
Here's a quick look at my layout before we begin!


 My inspiration from this layout came from the washi tape that is in this months kit! It's a beautiful sparkly silver star washi and I just fell in love with it! To create my large star, I took a piece of white card stock, hand sketched a large star and cut it out. I put a thin coat of multi matte medium down over the entire surface and began placing strips of the washi over it until it was completely covered.  Once all of the strips were in place, I added another layer of multi matte medium over the top of it as well.  I only did this because as my page sits in my album over the years, I don't want the washi to lift and the multi matte medium acts as a glue and sealer to keep it in place.  

While my star was drying, I added my layer of star paper over my background paper and began to create my mixed media background. I applied silver, pink and teal paints and mists from my stash with a paint brush and product packaging to get the messy look. Once both were dry, I placed my large star on my page on foam adhesive and began to add all of my different layers and embellishments.


 I used pieces from the cardstock die cuts, epoxy heart stickers, and red alphas from this months kit. I also brought in enamel dots, acetate doilies, chipboard and silver puffy heart stickers from past kits as well. The past couple of kits blend beautifully together!

I used one of the larger die cuts to add my journaling and placed it around all of the layers of my photo. I trimmed bits and pieces from the different patterned papers, 3x4 cards, vellum stickers and labels to add more details around the entire star. Tucking all of these pieces in around the edges of the star, I used thread to fill in some spaces and a chipboard "smiles" sticker from my stash on the top of my photo.  Lastly, I added enamel dots and red star gem stickers for the finishing touches. Here are a few other close ups of my layout.....


Thanks so much for joining me today!
I hope I've inspired you to look at your washi tapes in a different way!
Be sure to check out the December kits HERE today!


Thursday, January 4, 2018

"Celebrate" TN Layout | Shimmerz Paints

 Hello Shimmerz Fans!
Nicole here and today I have a travelers notebook layout to share with you featuring hand painted papers and embellishments using Shimmerz paint and mists!
Here's a look at my final layout:
 

I wanted to do a non-traditional Christmas layout, so I chose to paint random gifts in different colors and sizes in teal, green and peach. I used Coloringz in Oh say Can U Sea, Coloringz in Peachy Keen  and Inklingz Honey Do List as my palette. Once they dried, I used a silver/grey glitter gel pen to draw on the ribbons, bows and patterns.  I also painted a cluster of gifts together to use as an embellishment piece.


I used a few blank labels from my stash to do my journaling on, along with other bits of embellishments and puffy stickers for my title. I didn't add much more to the right side of the page since my focus was on the paper and gifts that I had painted.  On the left side, I kept it more on the simple side since the right side was so busy.  I added in a few more hand painted gifts and a few matching embellishments from my stash again.


And here's a look at my final layout again....


Thanks so much for joining me today!
I hope I have inspired you to create your own papers and embellishments for your layouts!
If you do, be sure to tag us on social media so we can see what you've created!


Wednesday, January 3, 2018

"Ugly" Sweater Layout | Freckled Fawn December Kits

Hello Lovelies!
Nicole here and I hope you and your families had a wonderful holiday season! It's hard to believe that it's already over!  I have a super fun and colorful layout to share with you today using the December Embellishment Kit and 12x12 papers and journaling cards.  Here's a look at my final layout:


I just absolutely love the sweaters and prints that pop up in papers and embellishments in this months kit.  It reminded me a lot of an "ugly" sweater so much that I just had to create one! I began by stitching a thicker strip of paper down my page. I then added in paint splatters and mists to give my background a little more interest. I found a cut file from the Silhouette store of a sweater and backed it with several of the papers from this months 12x12 papers.


I created my title using the red alphas that came in this months kit along with velum alphas from a past kit.  I used a lot of little pieces from the cardstock diecuts, epoxy heart stickers, resin pieces and even two of the wood veneer boarders under my photo and sweater. I also added in matching tangled thread under a couple areas around my page.


I fussy cut a couple pieces from the 3x4 cards including the sweater to the right of my photo and the larger speech bubble for larger embellishments.

 Here is one final look at my layout:


Thanks so much for joining me today!
I hope I have inspired you to create your own "ugly" sweater!