Hello Shimmerz fans!
Today I have something fun in store for you! I've been reorganizing my craft space and stumbled upon some rubber image stamps from The Greeting Farm and thought what a perfect time to share with you just how amazing Shimmerz can be on your girl and boy image stamps!
Water coloring images can be a little intimidating....I completely understand the feeling! Which ink? Which brush? But it's going to bleed into the next color...ugh... If water coloring these types of images is something newer to you, I have a suggestion...try heat embossing your stamped image! When you heat emboss, the embossing powder creates the separation needed to keep your colors from bleeding together! (If you don't have a heat tool, use some type of permanent ink, such as Archival Ink.) This for me was half of my battle in the beginning and once I over came this, my technique improved.
I began by heating embossing this image in black and two other images with white embossing powder, all on water color paper. I wasn't sure at first what I was going to create with it, so I did it in both colors. (I have examples of the white images further down the page.) I picked out some coordinating fall colors from my Shimmerz paints and my water brush and began to paint. When I water color my images, I start by wetting the area first. It helps to get the color moving. I then start by placing my brush down in the area I want the lightest. I know, as crazy as it sounds, putting your brush down first at the lightest area, then picking your brush up at the darkest area helps to keep the color concentrated where your brush leaves the page, making it the darkest. It will take some practicing to get used to this, so be sure to practice on a scrap area of your water color paper first.
How perfect is Pink Champagne and Cheeky Pink for skin and cheek colors?! <3
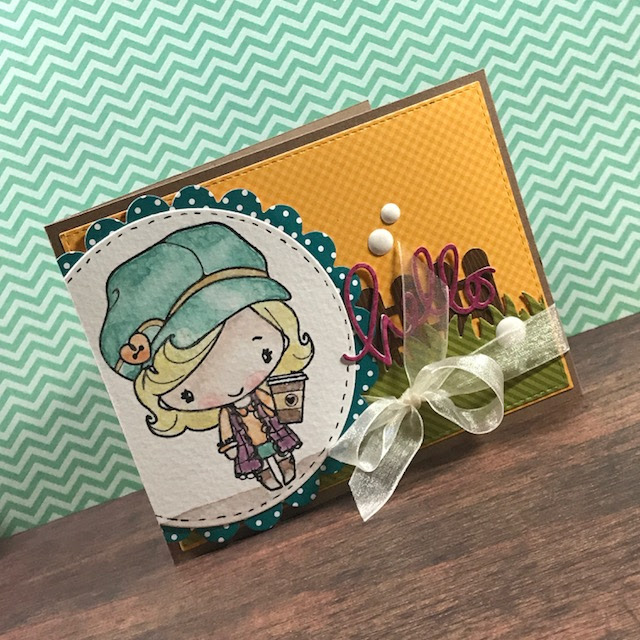
I decided to make Latte Anya into a card for a friend. Here's a look at my finished card:
I simply layered a wooden fence die cut, grass and a yellow background behind my image and a scallop background. Added a "hello" sentiment, a bow, a few enamel dots and its complete! The most time consuming part of this was paining the image itself and waiting for the areas to dry. In fact, while I was paining this image, I also painted two others with the white embossed image for another project. Here's a look at those images:
When I was done painting these, the biggest issue I had was the eyes and mouth were of course white. To solve that problem, I took a black fine tip sharpie and drew over them so they would stand out.
These two images I ended up fussy cutting and using in my planner spread this week!
Here's a look at my planner:
Thanks so much for joining me today! I hope you get out those embossing tools and give this a try! If you do, be sure to tag us so we can see your creations!
Until next time, have a colorful week!


No comments:
Post a Comment