Tuesday, January 9, 2018

Holiday Love Layout | Freckled Fawn Kit

Hello Lovelies!
Nicole here and today I have a fun and sparkly layout for you!
Today, I'm creating with the Freckled Fawn December Embellishment and Paper Kit.
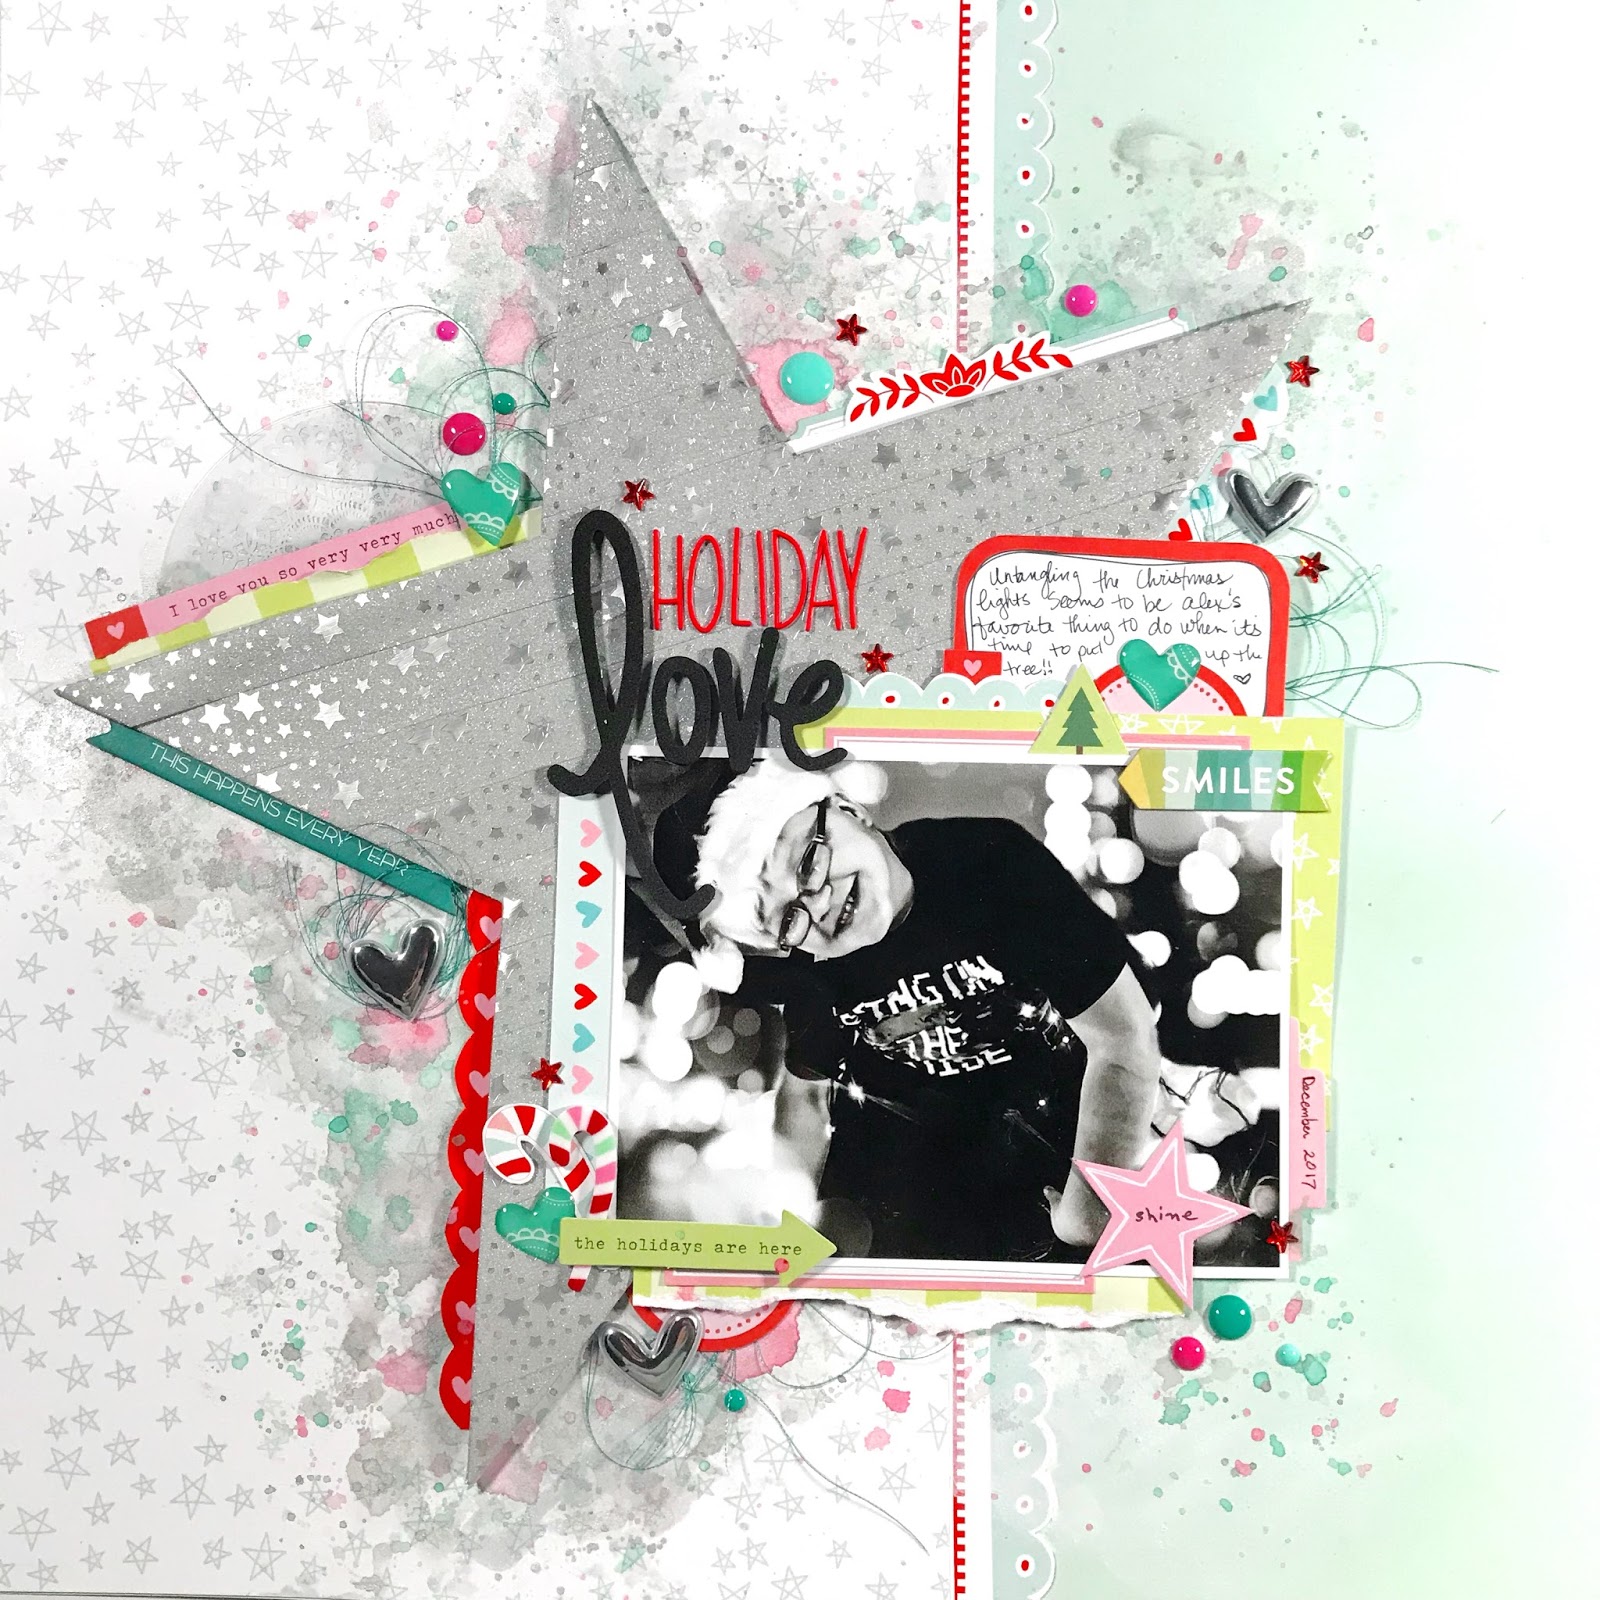
Here's a quick look at my layout before we begin!


 My inspiration from this layout came from the washi tape that is in this months kit! It's a beautiful sparkly silver star washi and I just fell in love with it! To create my large star, I took a piece of white card stock, hand sketched a large star and cut it out. I put a thin coat of multi matte medium down over the entire surface and began placing strips of the washi over it until it was completely covered.  Once all of the strips were in place, I added another layer of multi matte medium over the top of it as well.  I only did this because as my page sits in my album over the years, I don't want the washi to lift and the multi matte medium acts as a glue and sealer to keep it in place.  

While my star was drying, I added my layer of star paper over my background paper and began to create my mixed media background. I applied silver, pink and teal paints and mists from my stash with a paint brush and product packaging to get the messy look. Once both were dry, I placed my large star on my page on foam adhesive and began to add all of my different layers and embellishments.


 I used pieces from the cardstock die cuts, epoxy heart stickers, and red alphas from this months kit. I also brought in enamel dots, acetate doilies, chipboard and silver puffy heart stickers from past kits as well. The past couple of kits blend beautifully together!

I used one of the larger die cuts to add my journaling and placed it around all of the layers of my photo. I trimmed bits and pieces from the different patterned papers, 3x4 cards, vellum stickers and labels to add more details around the entire star. Tucking all of these pieces in around the edges of the star, I used thread to fill in some spaces and a chipboard "smiles" sticker from my stash on the top of my photo.  Lastly, I added enamel dots and red star gem stickers for the finishing touches. Here are a few other close ups of my layout.....


Thanks so much for joining me today!
I hope I've inspired you to look at your washi tapes in a different way!
Be sure to check out the December kits HERE today!


Thursday, January 4, 2018

"Celebrate" TN Layout | Shimmerz Paints

 Hello Shimmerz Fans!
Nicole here and today I have a travelers notebook layout to share with you featuring hand painted papers and embellishments using Shimmerz paint and mists!
Here's a look at my final layout:
 

I wanted to do a non-traditional Christmas layout, so I chose to paint random gifts in different colors and sizes in teal, green and peach. I used Coloringz in Oh say Can U Sea, Coloringz in Peachy Keen  and Inklingz Honey Do List as my palette. Once they dried, I used a silver/grey glitter gel pen to draw on the ribbons, bows and patterns.  I also painted a cluster of gifts together to use as an embellishment piece.


I used a few blank labels from my stash to do my journaling on, along with other bits of embellishments and puffy stickers for my title. I didn't add much more to the right side of the page since my focus was on the paper and gifts that I had painted.  On the left side, I kept it more on the simple side since the right side was so busy.  I added in a few more hand painted gifts and a few matching embellishments from my stash again.


And here's a look at my final layout again....


Thanks so much for joining me today!
I hope I have inspired you to create your own papers and embellishments for your layouts!
If you do, be sure to tag us on social media so we can see what you've created!


Wednesday, January 3, 2018

"Ugly" Sweater Layout | Freckled Fawn December Kits

Hello Lovelies!
Nicole here and I hope you and your families had a wonderful holiday season! It's hard to believe that it's already over!  I have a super fun and colorful layout to share with you today using the December Embellishment Kit and 12x12 papers and journaling cards.  Here's a look at my final layout:


I just absolutely love the sweaters and prints that pop up in papers and embellishments in this months kit.  It reminded me a lot of an "ugly" sweater so much that I just had to create one! I began by stitching a thicker strip of paper down my page. I then added in paint splatters and mists to give my background a little more interest. I found a cut file from the Silhouette store of a sweater and backed it with several of the papers from this months 12x12 papers.


I created my title using the red alphas that came in this months kit along with velum alphas from a past kit.  I used a lot of little pieces from the cardstock diecuts, epoxy heart stickers, resin pieces and even two of the wood veneer boarders under my photo and sweater. I also added in matching tangled thread under a couple areas around my page.


I fussy cut a couple pieces from the 3x4 cards including the sweater to the right of my photo and the larger speech bubble for larger embellishments.

 Here is one final look at my layout:


Thanks so much for joining me today!
I hope I have inspired you to create your own "ugly" sweater!


Wednesday, December 13, 2017

Winter Snowman Painting | Shimmerz Paints

Hello Shimmerz Fans!

Nicole here and today I have a fun, wintry project share! Recently I was inspired by a water colored snowman I saw online and knew that I wanted to paint something similar! Here's a quick look at my final watercolor piece:


I wanted to challenge myself and use just one product for this piece.  One that was cool toned and reminded me of snow and winter.  This entire piece was painted with different shades of Spritz, Walkin' a tight Heliotrope.  I sprayed bits of this color into my palette and watered it down to get the varying shades, with the darkest being the color directly from the bottle. Overall, it took many layers of color, beginning with the lightest and layering darker shades on top, drying each layer in between.


Just look at those shimmery pine trees!!! Once all of my layers were exactly how I wanted them, I got out my brown Micron pen to draw on his arms, white Signo gel pen to add the snow flakes and North Star, orange colored pencil to add his carrot nose and a black glitter gel pen to add in his eyes, mouth and buttons.  Here is a close up of my final painting:


Thanks so much for joining me today!
I hope I've inspired you to try this technique! If you do, be sure to share it with us!
If you purchase this color (or any color!) in the Shimmerz shop, be sure to mention my name in the comment section during checkout to get a free mini product!! Who doesn't love a free-bee?!?


Monday, December 11, 2017

You & Me Travelers Notebook Layout | Freckled Fawn

 Hello Lovelies!
Nicole here and today I have a very colorful travelers notebook layout to share with you!
This layout features the beautiful papers and charms from the November paper and embellishment kit from Freckled Fawn! Here's a quick overview of my final layout:


 My most favorite paper in this month kit is this vertical multi color/blocked sheet! I wanted to use that along with a piece that was more on the neutral side, so I chose the one with the teal scallop border. The busier papers I tend to use for my photograph so the more plain sheet I can use for any stamping, in this case, my title. 


I layered my photo with a coordinating 3x4 scallop card and added a large scaled scallop piece at the bottom of my photo that I trimmed from the same 12x12 sheet that I used on the other side of my layout.  I added the super cute floral charms from the November kit under my photo on some thread. To finish off the left page, I added in some enamel triangles & dots, a chip board sticker and a "today" wood veneer.


 Because the left page was so busy, I kept the right very plain.  I stamped my title in coordinating inks and embellished around it with November's enamel dots.  At the bottom of that page, I added in a strip of matching paper, a ticket that I punched from the November pocket cards, cardstock label for some journaling, foam arrow stickers and the enamel triangle stickers.


To finish my layout, I added some gold ink splatters.  Here's a look again at my final layout:


 Thanks so much for joining me today! I hope you got inspired!


Monday, December 4, 2017

Travelers Notebook Layout | November Freckled Fawn Kit

Hello Lovelies!
Nicole here and today I have a super fun travelers notebook layout to share with you!  For this layout, I'm using the November Freckled Fawn Papers and Embellishment kit! This kits is full of brightly colored papers and embellishments this month and its one of my absolute favs! (I feel like I'm starting to say this about a lot of their kits lately lol!) I love all the bright colors! Here's a close up of my final TN spread:

Because of the size and shapes of my pictures, I decided to go with the horizontal approach this time.  I wanted to keep the two pictures together, so I decided to put the bulk of my embellishments and title on the bottom solid blue paper. I chose a few papers from the kit and hand drew some sketchy trees and fussy cut them out to create my own matching ephemera pieces.  I created a little winter scene with my title, "Hello, Winter." I then added my chipboard sticker banners, enamel dot stickers, flag label stickers and white snowflakes with my gel pen.


For my top page, I layered my photos with a couple strips of patterned papers that match the trees. I used a scallop boarder punch to add more detail.  I added snowman and mitten ephemera from my stash, one of the adorable orange rubber houses, a few of the label stickers and several white foam heart stickers. I finished the layout by adding a white boarder around both pages.


Thanks so much for joining me today!
I hope you enjoyed and got inspired!


Friday, December 1, 2017

Holiday Cards with Shimmerz Paintz

Hello Shimmerz Fans!

Nicole here and today I have not one, not two, but four different card projects to share with you! Today is officially December 1st and the Holidays are if full swing!  Time to not only check those lists twice, but to get out those holiday cards to family and friends! Shimmerz makes it super simple to make traditional and non traditional cards because the shimmer helps is sparkle for the season!
Today I used minimal colors on each card to show you just how easy it is no matter what colors you may have!  Here's a look at my final projects:

When I began each of these cards, I used a piece of water color paper, that I eventually cut down to 4 1/4" x 5 1/2".  I wet each piece with water and misted and slopped color on with my #8 brush.  I found the bigger my brush, the more dramatic look I got.  Here's what my backgrounds looked like before I cut them down and embellished them.


Once they were dry, I trimmed them down and began my stamping. I picked large size images from my Holiday stamp collection to make a bigger impact.  I stamped them on my card fronts and heat embossed them with different embossing powders.  For the Cardinal card, I just stamped and embossed the image on the card, then used my watercolors to paint it.  Here are some close ups of my final projects:


The colors that I used on today's projects are:
Inklingz in She Packs a Punch, Greener Pastures, Can't Elope
Creameez in Ride the Tide and For Shore
Original Shimmerz paints in Winters Mist, Coal and Pixie Dust
Spritz in Walkin' a tight Heliotrope
Vibes in  Deep Blue Sea

Thanks so much for joining me today!
Have a great weekend!